
Blanket Ladder Plans PDF: A Comprehensive Guide
As colder seasons arrive, blankets emerge from storage, often cluttering living spaces. Creative storage solutions are vital, especially in smaller homes.
Numerous online resources offer blanket ladder plans in PDF format, aiding organization and adding aesthetic appeal. These plans range from free options to detailed, paid guides, catering to various skill levels and design preferences.
Blanket ladders represent a stylish and practical solution to blanket storage, transforming a potential mess into a visually appealing display. Historically, ladders served purely functional purposes, but their aesthetic potential has been increasingly recognized in interior design. Today, they’re embraced for their ability to add a rustic or modern touch to living rooms, bedrooms, and even hallways.
The core concept is simple: a leaning structure with rungs designed to drape blankets over. However, the execution can vary significantly, leading to diverse designs – from simple, minimalist constructions to more elaborate pieces incorporating shelves or decorative elements. Accessing blanket ladder plans in PDF format allows DIY enthusiasts to build these storage solutions tailored to their specific needs and preferences. These plans often include detailed instructions, material lists, and cutting diagrams, simplifying the construction process.
Ultimately, a blanket ladder isn’t just about storage; it’s about adding character and functionality to your home.
Why Build a Blanket Ladder? Space Saving & Aesthetic Benefits
Building a blanket ladder offers a compelling combination of practicality and style. For those with limited space, it provides a vertical storage solution, freeing up valuable floor area often occupied by bulky blanket chests or overflowing linen closets. This is particularly beneficial in smaller bedrooms or apartments where maximizing space is crucial.
Beyond space-saving, blanket ladders significantly enhance a room’s aesthetic. They transform neatly folded blankets into a decorative element, adding texture and color to the space. Utilizing blanket ladder plans in PDF format empowers you to customize the ladder’s design to complement your existing décor, choosing wood finishes and styles that align with your personal taste.
A well-crafted blanket ladder elevates the overall look of a room, offering a charming alternative to traditional storage methods.

Types of Blanket Ladder Designs
PDF plans reveal diverse designs: leaning ladders offer classic simplicity, step ladders provide easier access, and corner ladders maximize limited spaces.
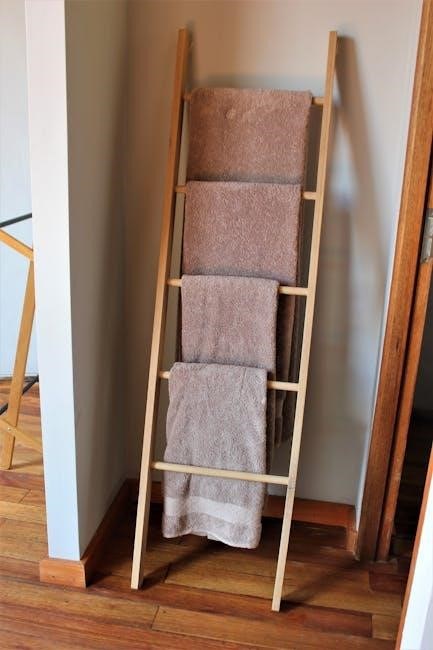
Leaning Blanket Ladder: The Classic Choice
Leaning blanket ladders represent the most traditional and widely recognized design. PDF plans for these typically showcase a simple A-frame structure, relying on a gentle slope against the wall for stability. This style is incredibly versatile, fitting seamlessly into various décor schemes – from rustic farmhouse to modern minimalist.
PDF instructions often detail varying rung spacing, allowing customization based on blanket thickness and desired aesthetic. Many plans emphasize the importance of wall anchors or anti-tip kits for safety, particularly in homes with children or pets. The construction process, as outlined in the plans, generally involves cutting ladder sides at an angle, attaching rungs with screws and wood glue, and finishing with sanding and a protective coating.
Beginner-friendly PDF guides frequently feature simplified instructions and material lists, making this design an excellent starting point for DIY enthusiasts. More advanced plans may incorporate decorative elements or unique wood finishes, elevating the ladder’s visual appeal.
Step Blanket Ladder: For Easier Access
Step blanket ladders offer a practical alternative to leaning designs, providing easier access to stored blankets, particularly for individuals with limited reach or mobility. PDF plans for these ladders typically feature a more pronounced stepped structure, resembling a miniature staircase. This design often incorporates wider rungs for comfortable blanket placement and retrieval.
Detailed PDF guides emphasize the importance of precise angle cuts to ensure stability and prevent wobbling. Construction usually involves creating sturdy side supports and securely attaching the stepped rungs using screws and wood glue. Many plans recommend reinforcing the structure with additional bracing for increased weight capacity.
PDF resources often highlight safety considerations, such as ensuring each step is level and providing a non-slip surface. More elaborate plans may include handrails or decorative side panels. These ladders are ideal for bedrooms or living rooms where frequent blanket access is desired, offering both functionality and style.
Corner Blanket Ladder: Maximizing Space
Corner blanket ladders are a brilliant solution for optimizing limited space, transforming often-unused corners into functional storage areas. PDF plans for these ladders typically showcase designs that snugly fit into 90-degree angles, maximizing vertical space without encroaching on room flow. They are particularly well-suited for smaller bedrooms or apartments.
Detailed PDF guides often include templates and cutting lists specifically tailored for corner configurations. Construction usually involves creating two angled side supports that precisely match the corner’s dimensions, and then attaching the rungs securely. Reinforcement is crucial to prevent swaying or instability.
PDF resources emphasize accurate measurements and careful assembly to ensure a flush fit against the walls. Some plans incorporate adjustable feet to compensate for uneven flooring. These ladders offer a stylish and space-saving alternative to traditional blanket storage, blending seamlessly into room décor.
Materials Needed for Building a Blanket Ladder
PDF plans detail wood choices—pine, oak, or alternatives—along with rungs, screws, wood glue, and finishing supplies. Accurate material lists ensure a smooth build process.
Wood Selection: Pine, Oak, or Other Options
Selecting the right wood is fundamental to a durable and aesthetically pleasing blanket ladder. PDF plans frequently recommend pine as a cost-effective and easily workable option, ideal for beginners. However, oak provides superior strength and a richer grain, suitable for heavier blanket loads and a more premium look.
Other viable choices include poplar, known for its smooth surface and paintability, or even reclaimed wood for a rustic charm. Consider the wood’s weight; heavier woods require more robust support. The PDF plans will often specify board dimensions and quantities needed, based on the chosen wood type. Always factor in the wood’s moisture content to prevent warping or cracking after assembly.
Furthermore, the chosen wood should complement your home décor. Pine readily accepts stain or paint, while oak’s natural beauty often shines through with a clear finish. Carefully review the PDF plan’s recommendations and your personal preferences before making a final decision.
Ladder Rungs: Choosing the Right Size & Material
The ladder rungs are crucial for both functionality and safety; Blanket ladder PDF plans typically suggest dowels, solid wood pieces, or even repurposed branches for the rungs. Dowels are affordable and easy to install, but may not support significant weight. Solid wood rungs, ideally matching the ladder sides, offer superior strength and durability.
Rung diameter or width is vital; a comfortable grip is essential. Plans often recommend a diameter between 1.5 to 2 inches. Spacing between rungs should accommodate folded blankets without overcrowding. Typically, 10-14 inches is a good range, but adjust based on blanket thickness.
Ensure the rung material is smooth to prevent snagging delicate fabrics. Sanding is crucial. The PDF plans will detail the precise rung length needed, based on the ladder’s overall width. Secure attachment – using screws and wood glue – is paramount for stability and preventing accidents.
Hardware Requirements: Screws, Wood Glue, & Finish
Successful blanket ladder construction relies on quality hardware. Most PDF plans specify wood screws – typically 1.25 to 1.5 inches long – for attaching rungs to the ladder sides. Pre-drilling pilot holes is essential to prevent wood splitting, ensuring a secure and lasting connection. Wood glue, specifically a strong wood adhesive, should be used in addition to screws for maximum stability.
The choice of finish impacts both aesthetics and durability. Polyurethane, varnish, or paint are common options. PDF plans may suggest specific brands or types. Sanding thoroughly before applying any finish is critical for a smooth, professional look.
Consider the environment; exterior-grade finishes are best for damp areas. Always follow the manufacturer’s instructions for application and drying times. Protective coatings seal the wood, preventing moisture damage and enhancing longevity.

Finding Blanket Ladder Plans (PDF) Online
Numerous websites offer downloadable blanket ladder plans in PDF format. Options range from free, basic designs to more detailed, paid plans catering to diverse skill levels and preferences.
Free PDF Plans: Resources & Considerations
Locating free blanket ladder plans in PDF format is readily achievable through various online platforms. Websites dedicated to DIY projects, woodworking forums, and even Pinterest often host user-submitted plans. However, exercising caution is crucial when utilizing these resources.
Free plans may vary significantly in quality and detail. Some might lack comprehensive instructions, precise measurements, or even safety guidelines. It’s essential to carefully review the plan before commencing construction, assessing its clarity and completeness.
Consider the skill level required. A beginner might struggle with a complex design lacking detailed explanations. Look for plans with clear diagrams, step-by-step instructions, and a materials list. Always prioritize safety and ensure the plan addresses potential hazards. Cross-referencing with multiple sources can help verify accuracy and identify potential issues before investing time and materials.
Remember that free resources often come “as is,” with limited support.
Paid PDF Plans: Benefits of Detailed Instructions
Investing in paid blanket ladder plans, typically available in PDF format, often unlocks a superior building experience. These plans generally offer a significantly higher level of detail compared to free alternatives, catering to both novice and experienced woodworkers.
Detailed instructions are a key benefit, often including comprehensive step-by-step guides accompanied by high-resolution images or even video tutorials. Precise measurements, cut lists, and materials specifications minimize errors and material waste.
Paid plans frequently incorporate safety considerations and troubleshooting tips, enhancing the building process and ensuring a stable, durable finished product. Customer support may also be available, providing assistance with any questions or challenges encountered during construction.
The investment can save time, frustration, and ultimately, money by reducing the likelihood of costly mistakes and rework.
Evaluating Plan Quality: What to Look For
When sourcing blanket ladder plans in PDF format, discerning quality is crucial for a successful build. Prioritize plans with clear, concise instructions and detailed diagrams – ambiguity leads to errors. A comprehensive materials list, specifying wood types, dimensions, and hardware, is essential for accurate budgeting and procurement.
Assess the plan’s complexity relative to your skill level. Beginner-friendly plans should offer simplified steps and fewer intricate cuts. Look for plans that address safety precautions, emphasizing proper tool usage and ladder stability.
Check for user reviews or testimonials, if available, to gauge the plan’s accuracy and ease of understanding. A well-structured plan will include precise measurements and consider weight capacity. Beware of plans lacking crucial details or appearing hastily prepared; these often result in frustrating outcomes.

Step-by-Step Building Guide (Based on Common Plans)
Common plans begin with precise wood cutting, followed by assembling the ladder sides. Attaching rungs securely ensures stability, utilizing screws and wood glue for a lasting build.
Cutting the Wood: Accurate Measurements are Key
Precise wood cutting is foundational to a stable and aesthetically pleasing blanket ladder. Most PDF plans emphasize the importance of double-checking all measurements before making any cuts. Utilize a high-quality measuring tape and a sharp saw – a miter saw is highly recommended for clean, angled cuts, particularly for leaning ladder designs.
Carefully transfer the dimensions from your chosen plan onto the wood, marking clearly with a pencil. Remember the adage: measure twice, cut once! Slight inaccuracies can accumulate, leading to instability or an uneven appearance. Consider the wood’s thickness when calculating rung placement; plans will specify appropriate spacing.
For beginners, it’s wise to practice cuts on scrap wood first to gain confidence and refine technique. Ensure your workspace is well-lit and ventilated, and always prioritize safety by wearing appropriate eye protection. Following the plan’s cutting list meticulously will streamline the building process and minimize errors.
Assembling the Ladder Sides
Once the wood pieces are cut, assembling the ladder sides is the next crucial step. PDF plans typically detail using wood glue and screws for a robust connection. Begin by laying out the side pieces, ensuring they are oriented correctly according to the plan’s diagrams. Apply a generous, even layer of wood glue to the joining surfaces.
Secure the pieces with screws, pre-drilling pilot holes to prevent splitting the wood. Clamps are invaluable here, holding the pieces firmly together while the glue dries. Ensure the sides remain square during this process; a speed square can be a helpful tool.
Most plans recommend allowing the glue to cure completely – usually 24 hours – before proceeding. This ensures a strong, lasting bond. Double-check for squareness again after the glue has dried, making any necessary adjustments before attaching the rungs.
Attaching the Rungs: Ensuring Stability
With the ladder sides assembled, attaching the rungs is paramount for structural integrity. PDF plans will specify rung placement and attachment methods, often involving wood glue and screws. Begin by marking the rung positions accurately on both ladder sides, ensuring consistent spacing. Apply wood glue to the ends of each rung where it will contact the ladder sides.
Position the rungs carefully, clamping them in place to maintain alignment. Pre-drilling pilot holes is essential to prevent wood splitting. Secure each rung with screws, driving them in straight and flush with the surface.
Periodically check for squareness as you attach each rung, preventing the ladder from becoming warped. Allow the glue to dry completely before applying any weight or stress to the ladder. A well-attached rung system is the key to a stable and functional blanket ladder.

Finishing Your Blanket Ladder
After assembly, sanding prepares the wood for a beautiful finish. Staining or painting allows customization, while a protective coating—like varnish—ensures durability and longevity.
Sanding & Preparation for Finishing
Proper preparation is paramount for a professional-looking finish on your blanket ladder. Begin with a thorough sanding, starting with a coarser grit sandpaper – typically 80 or 100 – to remove any imperfections, rough edges, or mill marks from the wood.
Progressively move to finer grits, such as 120, 150, and finally 220, smoothing the surface with each pass. This gradual refinement ensures a flawlessly smooth base for your chosen finish.

Pay close attention to corners and edges, ensuring they are rounded slightly to prevent chipping. After sanding, meticulously remove all dust with a tack cloth or a slightly damp cloth. Any remaining dust will compromise the adhesion of the stain or paint.
Consider using a wood conditioner, especially with softer woods like pine, to promote even stain absorption and prevent blotchiness. Allow the conditioner to dry completely before proceeding to the finishing stage.
Staining or Painting: Choosing the Right Color
Selecting the appropriate color for your blanket ladder significantly impacts its aesthetic appeal and how well it complements your home décor. Staining enhances the natural wood grain, offering a warm and rustic look. Popular stain choices include classic walnut, rich mahogany, or lighter oak tones.
Painting provides greater versatility, allowing you to match the ladder to your existing color scheme or create a bold statement piece. Consider shades of white, gray, or even vibrant colors to add personality.
Before applying, test the stain or paint on a scrap piece of wood from the same batch to ensure you achieve the desired hue. Multiple coats may be necessary for full coverage and richness.
Remember to allow each coat to dry completely before applying the next, following the manufacturer’s instructions for optimal results. A well-chosen color elevates the ladder from functional to a stylish accent.
Protective Coating: Sealing for Durability
Applying a protective coating is crucial for safeguarding your newly finished blanket ladder against wear and tear, extending its lifespan significantly. Several options exist, each offering varying levels of protection and sheen.
Polyurethane is a popular choice, providing excellent durability and resistance to scratches and moisture. It’s available in oil-based and water-based formulas, with oil-based offering greater durability but longer drying times.

Varnish is another viable option, providing a classic look and good protection; Wax finishes offer a softer, more natural feel but require more frequent reapplication.
Apply the coating in thin, even layers, following the manufacturer’s instructions. Allow each coat to dry completely before applying the next. Multiple coats enhance protection. A sealed ladder resists damage and maintains its beauty for years.

Safety Considerations When Building & Using
Prioritize woodworking safety with proper tool handling and precautions. Ensure ladder stability with secure placement, avoiding overloading to prevent accidents and maintain long-term use.
Woodworking Safety: Tools & Precautions
Embarking on a blanket ladder project necessitates a strong commitment to woodworking safety. Always wear safety glasses to protect your eyes from flying debris when cutting or sanding wood. A dust mask is crucial to avoid inhaling harmful wood particles, especially during sanding operations.
Utilize tools correctly and maintain them diligently. Ensure blades are sharp and properly installed on saws. Understand the safe operating procedures for each tool before use. A stable work surface is paramount; secure the wood firmly before cutting or drilling.
Be mindful of your surroundings and avoid distractions. Keep your workspace clean and organized to prevent trips and falls. Never reach over or around running machinery. When using power tools, always unplug them before making adjustments or changing blades. Remember, prioritizing safety ensures a successful and enjoyable building experience.
Ladder Stability: Ensuring Secure Placement
A blanket ladder, while aesthetically pleasing, must be exceptionally stable to prevent accidents. Before placing your finished ladder, carefully inspect the floor surface. Uneven floors can compromise stability; consider using shims to level the ladder’s feet.
Lean the ladder against a solid wall, ensuring a sufficient angle of inclination. Avoid placing it against fragile or unstable surfaces. For added security, especially with taller ladders, consider anchoring it to the wall using appropriate hardware – screws and wall anchors are recommended.
Regularly check the ladder for any signs of looseness or instability. Tighten screws as needed. Remember, a secure placement is crucial for preventing tipping and ensuring the safety of those around it. Prioritize stability above all else when positioning your newly built blanket ladder.
Weight Capacity: Avoiding Overloading
Determining the weight capacity of your blanket ladder is paramount for safe usage. This depends heavily on the wood type used in construction – pine has a lower capacity than oak or hardwoods. Carefully review your chosen blanket ladder plans PDF for guidance on appropriate wood selection and load limits.
Avoid overloading the rungs with excessively heavy blankets or other items. Distribute weight evenly across the ladder to prevent imbalance. Consider the combined weight of all blankets intended for display before loading.
Regularly inspect the ladder for any signs of stress or bending, which could indicate it’s nearing its weight limit. Prioritize safety by erring on the side of caution; it’s better to use multiple smaller ladders than to risk overloading a single one.

Customization Options
Blanket ladder plans PDF often serve as a base for personalization! Add shelves for extra storage, incorporate decorative elements, or adjust dimensions to perfectly fit your unique space.
Adding Shelves: For Extra Storage
Blanket ladder plans PDF frequently inspire modifications beyond the basic design. Integrating shelves transforms the ladder from a simple blanket holder into a versatile storage solution. This addition is particularly useful in smaller spaces where maximizing functionality is crucial. Shelves can be incorporated at various levels, offering dedicated spots for folded throws, books, magazines, or even decorative items.
When modifying blanket ladder plans PDF to include shelves, consider the weight capacity of the wood and the overall stability of the structure. Reinforcing the ladder sides and using sturdy shelf supports are essential. Plans may need adjustments to accommodate the added weight and ensure the ladder remains secure. The shelf depth and width should also be carefully considered to balance storage space with aesthetic appeal. Remember to account for the extra material costs when budgeting for your project.
Incorporating Decorative Elements
Blanket ladder plans PDF often serve as a starting point for personalized creations. Beyond functionality, decorative elements elevate a blanket ladder into a stylish home accent. Numerous customization options exist, ranging from simple paint or stain choices to more elaborate embellishments. Consider adding decorative molding to the sides or rungs for a refined look.
Many builders, inspired by blanket ladder plans PDF, incorporate stencils, carvings, or even metal accents to reflect their personal style. Distressing the wood can create a rustic, farmhouse aesthetic, while a glossy finish lends a modern touch. Remember to choose finishes that complement your existing décor. Small details, like decorative knobs or unique rung shapes, can significantly enhance the ladder’s visual appeal. Prioritize quality materials and careful execution to ensure a lasting and beautiful result.
Adjusting Dimensions to Fit Your Space
Blanket ladder plans PDF frequently offer standard dimensions, but adapting these to your specific needs is crucial. Measuring your available space accurately is the first step; consider both height and width restrictions. Scaling the plans up or down requires careful recalculation of wood lengths and rung placement to maintain structural integrity.
If ceiling height is limited, shortening the ladder’s overall height is straightforward. However, altering the width demands more consideration, potentially impacting stability. Many blanket ladder plans PDF are designed for standard blanket sizes, so adjust rung spacing accordingly if using larger or smaller throws. Don’t hesitate to modify the angle of the lean for optimal fit. Remember, a well-fitted ladder maximizes space and enhances the aesthetic appeal of your room, proving the value of customization.
Leave a Reply
You must be logged in to post a comment.